Monopoly Houses
|
This is a fairly simple but really fun project suitable for Tinkercad beginners. The houses and hotels pictured were created by a Year 5/6 class in their second ever Tinkercad lesson.
Here are two video tutorials on how to make Monopoly houses. Once you've got the hang of making a monopoly house, you should be able to figure out how to make a hotel. The only thing to bear in mind with the hotel is that if you have an overhanging roof (like in the picture to the right), you'll need to lay it flat on the workplane to print it successfully. |

|

Above: Tinkercad buildings created by a Year 5 & 6 Class.
Below: A selection of the 3D printed buildings.
Below: A selection of the 3D printed buildings.


|
|
|
Roman Temple
|
This is from the Tinkercad project tutorial 'Build a Roman Dome with Column’. However, if you follow the tutorial exactly you will not get a successful 3D print due to large areas of overhangs (see Glossary). Therefore you will need print the model in two parts. This is a fairly challenging project so I wouldn't recommend attempting it until you've completed the projects above.
Step 1: Follow the ‘Roman Column’ tutorial. I made my column (fig.1) 60mm tall, with a column diameter of 9.7mm and base width of 12mm, though you can choose your own dimensions. Things to watch out for: Make sure you don’t push the thin cylindrical holes of the column in too far (see correct depth in fig.2); otherwise it will cause problems in Step 2. Step 2: Group and export your finished column as an .stl file. You need to do this because your column won’t appear in the next part of the tutorial even though it says it will (this is a glitch in Tinkercad). Step 3: Click on ‘Done’. This will take you to the second part of the tutorial. Step 4: Import your column .stl file. Step 5: Follow the Tinkcad tutorial up to the end of page 7. I decided to use just 8 columns instead of the 16 in the tutorial (I made copies at every 45 degrees instead of the 22.5 degrees suggested). Step 6: From page 8 of the tutorial onward build the top part of the Roman temple as a separate part next to the bottom part (fig.3). Things to watch out for: Make sure the tops of your columns are exactly level with the top of the cylinder part of the bottom section. You can use the workplane tool to check this. Step 7: Group, select and export the two parts of the temple as separate .stl files. Step 8: Import the bottom part into Cura. Make sure ‘support’ is selected. This is to make sure that the top parts of the columns print correctly; they have a small area of overhang. I used the default 20% infill setting which worked fine. Step 9: Print the bottom part of your temple and gently remove the supports. Step 10: Import the .stil file of the top part of your temple into Cura. Make sure ‘support’ is NOT selected! Supports are not needed for this part. Step 11: Print it! Step 12. Stick the top part of your temple to the bottom part. Voila! You now have a Roman Temple. |

|


Lithuanian Candle House
|
UPDATE: Scroll down to the next section for a video tutorial showing you how to create a simplified candle house.
Candle houses have been a popular ornament in Lithuania for centuries and are often displayed at Christmas time. My project is designed to use LED tea lights which are much safer than real ones. PLA has a melting point of around 180 degrees centigrade so a real candle would melt the roof and possibly start a fire! So definitely DO NOT use a real candle in your model! I’ve added a few pictures from the modelling process. Part of the charm of Lithuanian candle houses is that they are usually handmade, and consequently no two are exactly the same. Therefore I would encourage you to look at pictures of other houses and come up with your own designs. This project was something of an experiment to see if the printer could manage overhangs without using support, and was a success in this regard. No support was used for either of the two parts of the model. The roof section had thick enough walls and a steep enough slope that it was able to print successfully. In Figures 3 and 4 you can see the shapes that make up the roof. It is very important to create an inner roof-shaped hole, otherwise there would be a ‘ceiling’ above the first floor which would not print correctly as it would be a very large area of overhang. It is also very important to only add this inner hole after all the other parts of the roof have been modelled. Here were a few time-saving tips: 1) Duplicate windows and window frames instead of making them individually. 2) Duplicate and scaling the semi-circle windows instead of making larger ones from scratch. 3) Hold the ‘alt’ key while rotating to create a duplicate. 4) In case of mistakes, I make several copies of each house section as you go along. As you can see I printed a half-size version first. This was to test if the overhangs would print. |
|


Right: Simple Candle House
|

|
Here’s a clip from a company in Lithuania that still makes candle houses.
|
Simple Candle House
Here is a video tutorial for the simplified candle house.
|
|

Candle Houses by five Year-5 pupils.
|
Hagrid's House
|
|
|

|
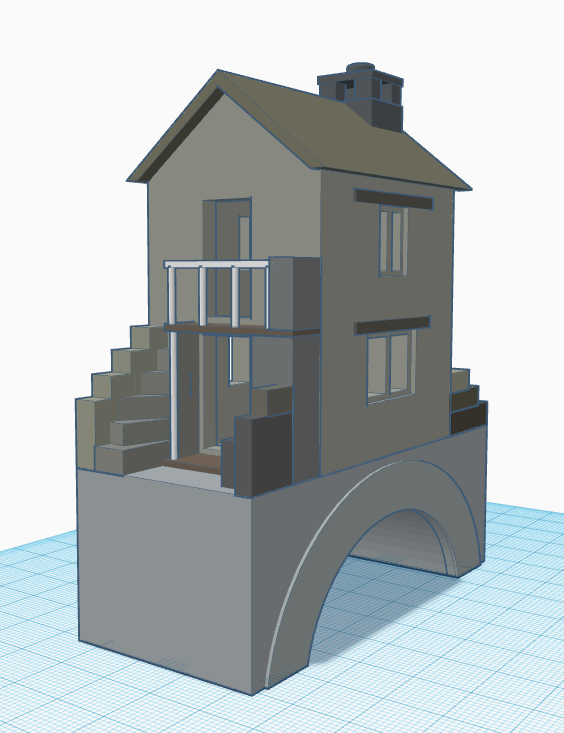
The Bridge House (Ambleside)

|

|
|
|
|
|
Mayan Temple (Tikal 1)

|

|

|
4 Privet Drive (Simplified)

|

|

|